 Merrion Design Review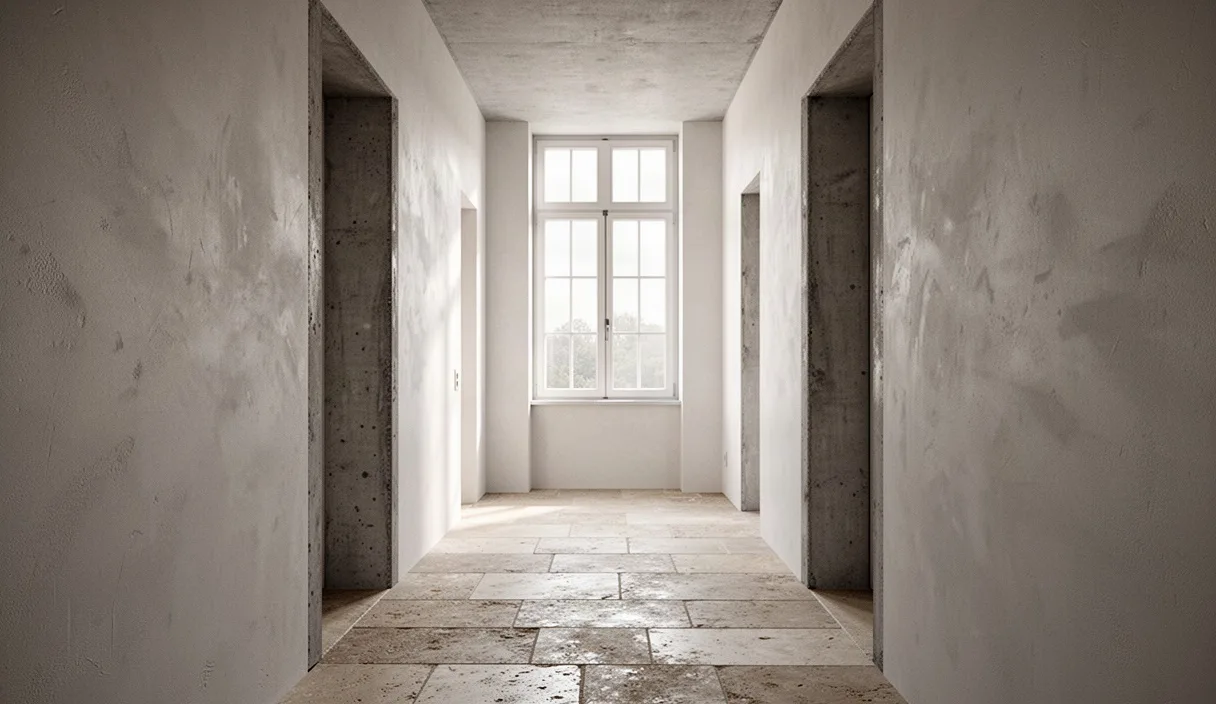

Row houses, urban terraces, and narrow parcels present a distinct architectural problem. When a residential footprint measures between four and six meters in width yet extends twenty meters or more in depth, the interior can rapidly take on the character of a tunnel or a fragmented chain of dark cells. The discipline of planning sightlines addresses this condition directly. By orchestrating how vision travels through an elongated interior, the designer can establish a sense of composure, calibrate spatial boundaries, and bring an orderly quality to homes that might otherwise feel confined.
In this review, we examine the principles that govern long-axis vistas in deep, narrow residences. While superficial decorative interventions often attempt to mask spatial constraints, true spatial balance depends upon rigorous geometric alignment, careful material transitions, and the disciplined introduction of natural light. The following guidance outlines the technical considerations required to establish long domestic vistas without sacrificing privacy, acoustic control, or structural integrity.
The Geometry of Visual Depth in Row Houses
The human eye assesses interior volume largely by reading the distance to the furthest legible boundary and the cadence of the planes that lead toward it. In a narrow floor plan, where the aspect ratio of width to depth frequently exceeds one to four, unchecked lateral enclosure causes the perimeter walls to dominate the visual field. If those walls are flat and unarticulated, the perspective lines converge sharply toward the center, creating an aggressive vanishing point that makes the dwelling feel smaller and more compressed than its measured floor area suggests.
To moderate this convergence, the long axis must be broken into rhythmic intervals rather than left as an uninflected corridor. Introducing intermediate visual pauses, such as a shallow recess, an exposed nib wall measuring 150 to 200 millimeters, or a framed structural opening, provides the eye with scale markers. These markers establish relative distance. Instead of confronting an immediate, unbroken run of twenty meters, the observer perceives a composition of linked rooms, each possessing its own geometric identity while contributing to the whole.
Furthermore, sightlines should rarely terminate in an empty corner or a blank, unlit partition. A successful vista terminates at an architectural anchor: a landscaped courtyard, a piece of fixed joinery, a hearth, or an art niche washed with daylight. When the terminal point provides an engaging focus, the intervening transit zone recedes into the background, and the home feels generous rather than pinched.
Aligning Door Openings Across Consecutive Rooms
The classical device of the enfilade, in which doorways through a series of rooms align on a single visual axis, remains the most effective tool for organizing narrow plans. When applied to modern domestic architecture, however, the central enfilade must often be modified. Placing an axis dead-center through a five-meter-wide house tends to bisect each room, leaving narrow usable zones on either side that cannot accommodate standard furniture layouts. A perimeter or offset axis is generally preferable.
An offset alignment arranges openings along one primary circulation path, typically held between 900 and 1200 millimeters from a party wall. This arrangement preserves an unbroken expanse of wall for primary furniture groupings, such as seating or dining tables, while maintaining a clear view from the front entrance through to the rear garden. To achieve visual continuity, the door heads should share an identical datum. Standard interior door frames are set at 2040 or 2100 millimeters; however, extending door openings to the full ceiling height of 2400 or 2700 millimeters removes the horizontal downstand entirely, allowing the eye and the ceiling plane to travel uninterrupted across structural bays.
The choice of door hardware and door hanging also governs the quality of the sightline. Traditional hinged doors can introduce visual clutter when left standing open at arbitrary angles. Pocket doors, sliding panels that conceal themselves within stud partitions of 140 millimeters overall thickness, or pivot doors that rest flush with the wall surface allow the enfilade to remain crisp and intentional.
| Alignment Strategy | Axis Placement | Usable Wall Space | Sightline Character |
|---|---|---|---|
| Central Enfilade | Centerline of floor plan | Fragmented into narrow bilateral zones | Formal, classical, highly dramatic |
| Perimeter Offset | 900 to 1200 mm from party wall | Maximized along one primary wall | Clean, practical for narrow footprints |
| Interrupted Axis | Alternates laterally between bays | Varied according to room function | Informal, protective of acoustic privacy |
Managing Floor Finishes to Guide the Eye
Flooring selections exert a strong influence over the perceived length and width of a domestic interior. The eye naturally tracks along linear joints, grain patterns, and grout courses. When floor finishes are installed haphazardly or alternated abruptly from room to room, the continuous sightline is fractured, drawing unwanted attention to the narrow footprint. Conversely, disciplined surface detailing can reinforce visual depth or visually widen tight corridors.
When selecting timber boards, orientation is paramount. Laying boards parallel to the long axis emphasizes the directional pull of the plan, which can be advantageous if the goal is to draw the eye toward an external garden view. However, in spaces narrower than 3.6 meters, this technique can exaggerate the corridor effect. Laying timber boards perpendicular to the long axis introduces horizontal bands that visually widen the room, though it requires precise installation to prevent board ends from producing visual noise. A herringbone or chevron parquet, set with the points running along the primary axis of travel, strikes a workable balance: it offers lateral spread while retaining directional momentum.
Threshold transitions between spaces demand precise execution. Raised timber thresholds or metal transition strips interrupt visual movement across the floor. Where stone tiles meet timber, or where an indoor living zone meets an outdoor terrace, the finishes should sit flush, separated only by a discrete three-millimeter brass or stainless steel angle, or an elastomeric movement joint. Keeping floor levels completely level across the entire ground floor eliminates visual interruptions, encouraging the eye to see adjacent zones as parts of a coherent whole.
Positioning Secondary Daylight Apertures
The greatest challenge in deep row houses is the dark center. Because daylight penetrates effectively only to a depth of roughly two to two-and-a-half times the window head height, a room with 2.7-meter ceilings receives meaningful natural light only within six to seven meters of an external wall. In a house twenty meters long, the middle six to eight meters remain shrouded in gloom unless secondary apertures are introduced. A sightline that passes through a dark zone into a lit zone feels abrupt and fractured.
To maintain visual equilibrium, light must be introduced at intervals along the path of travel. Several methods achieve this without compromising the building footprint:
- Internal Lightwells: A modest void measuring 1.8 by 2.4 meters, placed against a party wall, introduces vertical light into the middle of the floor plan. Glazing this lightwell on two sides creates transparent layers that the primary sightline crosses, transforming a dead interior core into a luminous focal point.
- Clerestory Glazing and Transoms: Where fire codes and privacy requirements permit, partition walls should feature glazed transoms above the 2100-millimeter door datum. This borrows light from peripheral rooms to soften the contrast between light and dark zones along the central spine.
- Rooflights Above Stair Cores: Placing an overhead lantern or linear skylight over the central staircase allows daylight to wash down the vertical circulation zone. The stair void then acts as a vertical reflector, illuminating the ground-floor hallway.
When designing these openings, one must avoid glare. Direct, unmediated zenithal light falling into a dark corridor creates extreme contrast ratios that strain the eyes. Etched glass, timber baffle blades, or deep light reveals help diffuse secondary daylight, spreading a gentle wash of luminance across vertical surfaces rather than casting harsh geometric shadows.
Common Structural Pitfalls in Long Floor Plans
Realizing an ambitious sightline frequently requires structural alterations. In older terraced housing, floor plans are divided by cross-walls that support floor joists and roof loads, as well as chimney breasts projecting from the party walls. Removing or modifying these elements introduces structural complexities that must be managed with care.
A frequent error is the uncontrolled introduction of downstand steel beams. When a load-bearing partition is removed to link two rooms, the supporting beam is often set beneath the joists to avoid the expense of cutting into the floor structure above. This creates a downstand beam dropping 250 to 350 millimeters below the ceiling plane. While the floor area becomes continuous, the visual sightline is truncated by a heavy lintel overhead. To preserve an unbroken vista, steelwork should be rolled into the floor depth using shelf angles or concealed flitch beams, ensuring that the ceiling datum remains level across the entire span.
Chimney breast removal also presents significant risk. When a ground-floor chimney breast is removed to clear a sightline along a party wall, the remaining masonry on the upper floors must be adequately supported. Supporting upper brickwork with steel gallows brackets is prohibited in many jurisdictions and structurally inadvisable in older masonry. The designer must instead install full-width steel beams bearing on padstones, or a goalpost frame anchored to sound foundations. A structural engineer must always be retained to calculate deflection limits and load paths before any masonry is dismantled.
Common Mistakes in Sightline Planning
Even with careful structural preparation, sightlines can be undermined by errors in the arrangement of the interior. The following oversights are among the most frequent encountered in practice:
- Cluttering the Vista Terminus: Allowing a sightline to end at a utility door, an exposed kitchen sink, or an uncurtained bathroom window disrupts the sense of architectural composure. Every primary axis must conclude with a deliberate, organized view.
- Neglecting Storage Depths: Failing to integrate full-height cabinetry flush with structural nibs leads to furniture that projects awkwardly into circulation zones, pinching the line of sight and obstructing movement.
- Unbalanced Artificial Illumination: Over-lighting the foreground while leaving the distant terminus dim foreshortens the perceived depth of the dwelling, making long spaces look unexpectedly shallow at night.
- Ignoring Acoustic Transmission: Aligning open doorways creates an acoustic highway through the residence. Without solid-core doors or acoustic seals, conversations, appliance noise, and footsteps travel unchecked from one end of the building to the other.
Recommended Next Steps
Executing an intentional sightline requires systematic preparation. Those embarking on renovations in narrow residential structures should proceed through the following orderly stages:
- Commission a Comprehensive Measured Survey: Obtain a detailed three-dimensional survey of the property that documents wall thicknesses, ceiling heights, floor levels, and the exact positions of party walls and chimney projections. Precise alignment cannot be achieved using approximate dimensions.
- Establish the Primary Axis: On your schematic plans, draw a single line from the front threshold to the rear boundary. Adjust internal room layouts to align doorways, structural openings, and external glazing along or parallel to this datum.
- Coordinate Structural and Services Infrastructure: Engage a qualified structural engineer early in the process. Specify that all support beams must sit flush with the ceiling joists to avoid downstands along the sightline path. Review ductwork, plumbing drops, and electrical distribution routes to prevent service bulkheads from dropping into the visual axis.
- Verify the Sightline on Site: Before constructing final partition walls, set up a laser level along the intended axis on the clear floor plate. Mark the openings on existing masonry or subfloors to verify that the proposed views are balanced and free from unintended sightline obstructions.