 Merrion Design Review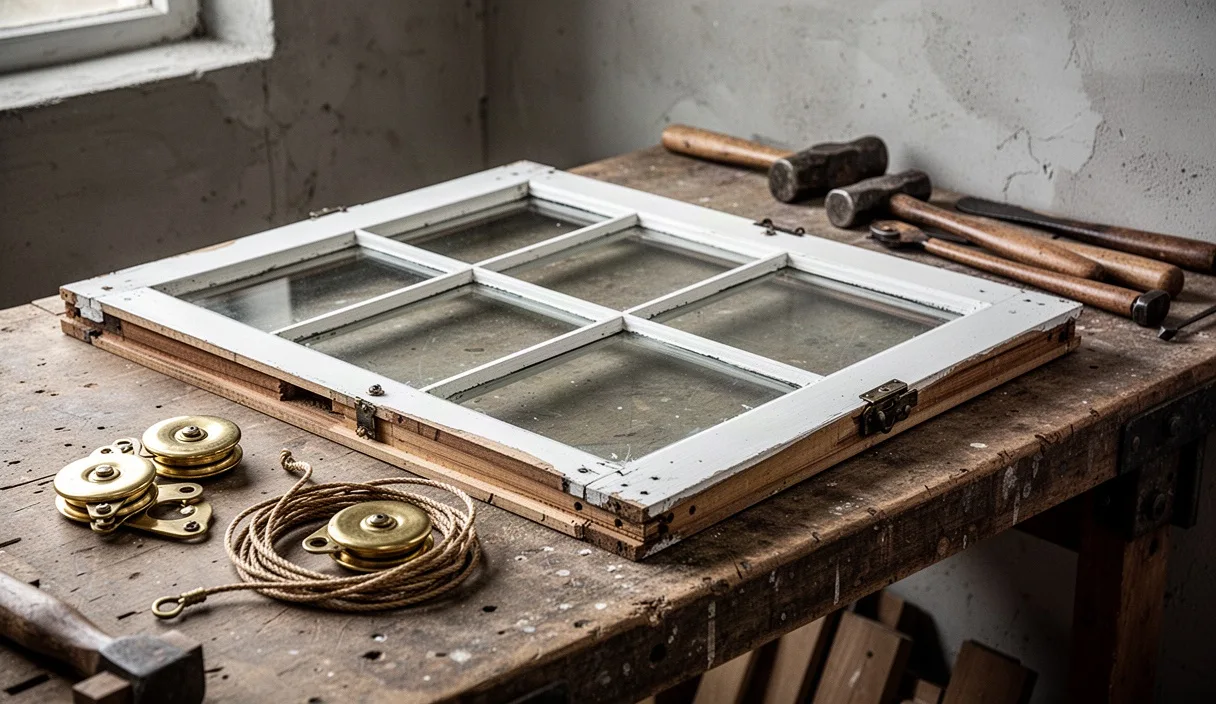

The traditional timber sash window remains one of the defining architectural achievements of the eighteenth and nineteenth centuries. Designed with counterbalanced sashes that slide vertically within a cased frame, this mechanism provided variable, draft-free ventilation long before the advent of mechanical environmental controls. In properties built during the Georgian, Victorian, and Edwardian eras, original joinery survives largely because craftsmen used slow-grown, resinous Baltic pine or native hardwoods. These timbers possess natural rot resistance that far exceeds modern commercial softwoods, making complete replacement both historically irresponsible and structurally unnecessary in the majority of cases.
Nevertheless, centuries of building settlement, neglected maintenance, layered lead paint, and brittle glazier putty frequently leave historic sashes inoperable or thermally deficient. Many property owners assume that draftiness and thermal transmittance necessitate the installation of modern plastic or aluminium replicas. In practice, the retention and careful overhaul of original fabric can dramatically reduce air infiltration while maintaining the architectural integrity of the building. This review outlines the methodical conservation of historic timber sashes, balancing structural repair with sensible thermal improvements.
Assessing Joinery Condition and Putty Degradation
Before any timber is cut or paint stripped, a comprehensive survey of the entire window assembly is necessary. The surveyor or joiner must systematically examine the sill, the lower rail of the bottom sash, the meeting rails, and the lower ends of the pulley stiles. These lower elements are most vulnerable to moisture pooling and fungal rot. Using a non-destructive moisture meter, timber readings should be documented across multiple points. Moisture content below 16 percent indicates sound conditions; readings between 16 and 20 percent warn of vulnerability, while readings consistently exceeding 20 percent indicate active fungal decay.
The condition of glazier putty requires equal scrutiny. Over decades, linseed oil within traditional putty oxidises and dries out, causing the compound to shrink, crack, and detach from the rebate and glass. Loose putty allows water to migrate behind the glass pane, where it sits against the untreated timber rebate. When assessing the putty line, look for chalking, missing sections, and loose bedding. Historic cylinder glass or crown glass is often irregular and fragile, frequently measuring between 1.8 millimetres and 2.5 millimetres in thickness. Any attempt to chip out dried putty with a hammer and chisel risks shattering irreplaceable historic glass.
To safely evaluate and remove degraded putty, specialists follow a controlled sequence:
- Gentle mechanical probing: Run a dull spatula along the putty bed to separate sections that have already lost mechanical adhesion.
- Localised softening: Apply targeted infrared heat or low-temperature steam blankets along the glazing bars. This softens dried oil putty without thermal shock to the glass. Modern hot-air guns should be avoided, as the sudden heat gradient easily fractures historic glass panes.
- Rebate inspection: Once the putty is removed, inspect the timber rebate for black mold, iron sprig rust, and hairline splits. Rusted steel glazier sprigs must be removed and replaced with copper or brass equivalents to prevent future expansion damage.
Where rot has compromised up to 30 percent of a bottom rail or sill, complete replacement is unwarranted. Sound conservation practices dictate timber splicing (piecing-in) using matching seasoned timber with compatible grain direction. For minor surface deterioration, conservation-grade two-part epoxy resins formulated specifically for historic woodwork provide long-lasting consolidation without creating brittle hard spots in the timber.
Rebalancing Counterweights and Cord Tension
The effortless movement of a traditional sash depends entirely upon exact counterbalancing. A typical double-hung window features two sashes hung on woven cords passing over brass axle pulleys to cast-iron or lead counterweights suspended in hidden side pockets. When ropes rot, break, or are severed during rough maintenance, the sash drops or binds. Sashes also become unbalanced when glass is replaced with heavier modern glass or when layers of accumulated paint add excess weight to the timber frames.
To access the weights, one must remove the interior staff beads, extract the lower sash, pry out the parting beads, and open the pocket covers located near the base of each pulley stile. Each sash should be detached from its cords and weighed on a hanging spring balance or platform scale. For the top sash, the combined weight of its two counterweights should match the weight of the glazed sash, or exceed it by roughly 0.5 kilograms to ensure it stays firmly closed against the head of the frame. Conversely, the lower sash counterweights should weigh roughly 0.5 kilograms less than the glazed sash to ensure that the window does not creep upward unassisted.
Restringing and balancing requires methodical attention to materials and measurements:
- Inspecting the pulleys: Check each brass or iron axle pulley for wear. Clean out hardened paint and lubricate the axle with graphite powder or light machine oil. Avoid heavy grease, which traps dust.
- Selecting the cord: Install pre-stretched, wax-impregnated braided cotton sash cord containing a synthetic core. Traditional pure cotton stretches over time, whereas nylon-reinforced cords maintain their length over decades under heavy loads.
- Threading and hanging: Feed a lead mouse attached to a light string over the pulley and drop it down the weight pocket. Tie the sash cord to the string and pull it through. Tie the cord securely to the counterweight using a traditional figure-eight or round turn and two half-hitches.
- Adjusting the drops: Suspend the weight inside the pocket so that it hangs approximately 75 millimetres clear of the pocket floor when the sash is in its fully raised position. This prevents the weight from grounding before the sash closes.
- Anchoring to the sash: Pull the cord tight, set it into the grooved edge of the sash stile, and secure it with three countersunk copper tacks or brass screws. Ensure the cord does not protrude beyond the groove, which would cause the sash to bind against the pulley stile.
Integrating Discreet Draught-Proofing Channels
Historic sash windows are inherently built with clearance gaps of two to three millimetres to permit movement during humid summers when timber swells. In winter, this clearance becomes a primary source of convective heat loss and air infiltration. Traditional conservation projects avoid surface-mounted rubber sweeps, which look incongruous and degrade under ultraviolet light. Instead, the correct methodology integrates concealed brush or polypropylene pile seals directly into the operational perimeter.
The standard system replaces the existing parting beads and staff beads with authentic matching timber profiles that feature a discreet hidden channel on one side. This channel houses a low-friction, silicone-treated polypropylene pile carrier. Because the pile is held within the bead or routed into the sash meeting rail, it remains hidden from both interior and exterior view when the window is closed.
Joiners typically machine the draught-proofing elements into four strategic junctions:
- Parting bead: The vertical parting bead between the two sashes holds pile seals that contact the sash stiles without creating mechanical drag.
- Staff bead: The interior perimeter staff bead contains pile seals that press lightly against the face of the lower sash.
- Meeting rails: A shallow rebate is machined into the interlock where the top and bottom meeting rails converge. A brush seal embedded along this junction stops the draft created by the stack effect in the house.
- Bottom rail: A discreet groove along the underside of the bottom sash accommodates an elastomeric tubular fin seal that compresses against the timber sill when latched.
Independent laboratory testing indicates that high-quality concealed perimeter sealing can reduce air leakage through an original timber sash window by up to 85 percent. This brings air permeability down to values comparable with newly manufactured casements, drastically improving occupant comfort without removing a single historic timber component.
Thermal Performance: Historic Single Glazing versus Slim Units
Thermal transmission through glass is measured by its U-value, expressed in Watts per square metre Kelvin (W/m²K). A lower U-value represents superior insulating capability. Historic 2-millimetre single sheet glass provides an approximate U-value of 5.8 W/m²K. In contrast, modern standard double glazing achieves values between 1.2 and 1.4 W/m²K, but requires a glass unit thickness of 20 to 28 millimetres. Such thick units cannot fit into original sash rebates without destroying the fine profiles of eighteenth- and nineteenth-century glazing bars.
Where local conservation authorities allow the alteration of original glazing, evacuated vacuum units or slim-profile double-glazed units offer an engineered alternative. Slim units utilise a total cavity of between 4 and 8 millimetres, filled with inert krypton or xenon gas, paired with low-emissivity glass coatings. However, slim units carry distinct structural considerations: their narrow cavities can place excessive stress on perimeter seals, potentially leading to premature breakdown and condensation between panes.
| Glazing Configuration | Approximate U-Value (W/m²K) | Overall Glass Thickness | Conservation Suitability |
|---|---|---|---|
| Historic Single Sheet (Float/Cylinder) | 5.8 | 2.0 to 3.0 mm | Optimal for Grade I and II* listed properties; preserves historic optics. |
| Single Glazing with Heavy Secondary Glazing | 1.8 to 2.2 | 2.0 mm (primary) + 6.0 mm (secondary) | High conservation acceptance; completely reversible with zero joinery loss. |
| Slim Krypton Gas Insulating Unit | 1.9 to 2.4 | 10.0 to 12.0 mm | Variable acceptance; requires rebate deepening which weakens original stiles. |
| Vacuum Insulated Glazing (VIG) | 0.7 to 1.1 | 6.5 to 8.5 mm | Emerging technology; slender profile, though micro-spacers are subtly visible. |
For buildings subject to strict heritage protections, secondary glazing installed internally remains the preferred intervention. When fitted with low-emissivity glass and separated from the primary sash by an air cavity of 100 millimetres or more, secondary glazing achieves a thermal U-value below 2.0 W/m²K. Furthermore, it outperforms standard double glazing in acoustic attenuation, reducing ambient traffic noise by up to 45 decibels.
Long-Term Maintenance of Linseed Oil Paint Systems
Modern film-forming alkyd and acrylic paints are responsible for much of the decay observed in historic sashes. These coatings form an impermeable plastic skin over the wood. When water inevitably penetrates behind the paint through microscopic movement cracks, the coating traps the moisture against the timber. Trapped moisture combined with solar warmth creates ideal conditions for wet rot while causing the synthetic paint to blister and peel away.
Traditional boiled linseed oil paint provides a protective alternative. Linseed oil molecules are significantly smaller than the pore structures of wood, allowing the paint to penetrate deep into the timber grain rather than sitting as a tensioned film on the surface. Because it contains no plasticizers or solvents, pure linseed paint breathes, allowing moisture to evaporate freely out of the wood as atmospheric humidity shifts.
Application requires patience and thin layers:
- Substrate preparation: Wood must be clean, dry (moisture content below 14 percent), and free of residual modern synthetic coatings. Rub down the raw wood and treat any bare end-grain with raw, cold-pressed linseed oil.
- The priming coat: Apply a diluted coat containing roughly 30 percent pure gum turpentine or balsam turpentine mixed with linseed paint. Work this coat into the timber pores with a stiff, natural bristle brush.
- Intermediate and top coats: Apply two subsequent thin coats of undiluted boiled linseed oil paint. Allow at least 24 hours between coats in warm, dry weather. The coats must be brushed out exceptionally thin; heavy coats will wrinkle upon curing.
Maintenance of a linseed oil system does not require burning off or aggressive sanding. When the surface begins to dull or chalk after four to seven years, it is revitalised simply by washing the window down with mild soapy water and wiping a thin coat of boiled linseed oil over the surface with a lint-free cloth. The oil reconditions the pigment and restores water resistance for several more years.
Common Mistakes in Sash Conservation
Historic joinery is frequently damaged by well-intentioned but fundamentally flawed repair techniques. Avoiding these errors protects the investment made in skilled conservation:
- Using structural silicone instead of putty: Replacing traditional linseed oil glazier putty with silicone sealant creates severe maintenance problems. Silicone cannot be sanded, does not accept traditional paint, and adheres with such strength that future pane replacement requires cutting away the surrounding wood.
- Applying polyurethane expandable foam: Filling gaps between the sash box and masonry with expanding polyurethane foam can bow the pulley stiles inward. This pinches the sashes and arrests their movement. Box gaps should be packed with traditional sheep wool insulation, loose oakum, or breathable lime mortar.
- Over-weighting sashes with excessive lead: Adding extra weights without verifying clearances can cause weights to clash inside the pocket, leading to severed cords and jammed windows. Always verify the physical width of the weight pocket before installing thicker lead weights.
- Painting over meeting rail seals: Applying paint directly over pile brush seals or silicone draught tubes stiffens their fibers, entirely eliminating their air-sealing properties and causing the sashes to bind tightly.
Practical Next Steps
Property owners wishing to conserve their historic sashes should proceed cautiously. Begin by conducting an inventory of every window in the property, noting operability, glass type, rot depth, and perimeter drafts. If your building is listed or sits within an established conservation district, consult your local planning authority or a qualified conservation officer before commissioning any joinery alterations, particularly if considering slim double glazing or rebate modifications.
Next, engage a joiner who specialises specifically in traditional sash conservation rather than general modern fenestration. Request to inspect examples of their spliced repairs and concealed draught-proofing installations. For initial repairs, tackle the most exposed elevations first, typically south- and west-facing windows that bear the brunt of seasonal weathering. By systematically overhauling the timber, balancing the counterweights, and restoring breathable paint systems, historic sashes will comfortably perform their function for another century without compromising the architecture they define.